
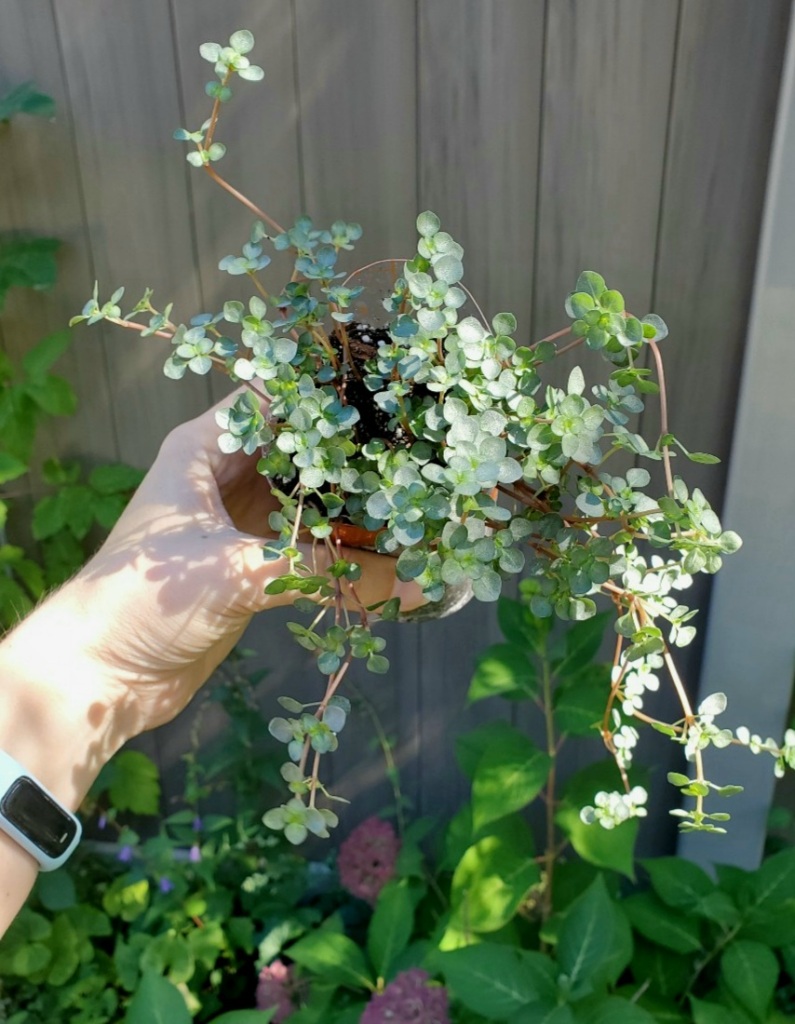
This pilea sparkles in the sun. Its colour just doesn’t capture on camera; it’s got almost a lime green centre for each set of leaves, which fades out to this grey-aqua-green dusty full leaf of hypnotic little sandpaper-like gritty-looking (but not gritty-feeling) sparkles.
Spaaaaarklyyyyyyyy
- Binomial name: Pilea glaucophylla ‘Aquamarine’, although perhaps there is no true cultivar name…? However, this was the name I bought it under.
- Given name: Eska
- Native to: Brazil, Colombia; rainforests
- Bought: August 27, 2021 at House of Plants
- Grown in: unknown
- Original pot: 3.5 inch nursery
Field notes–Sept 19, 2021
- Soil: moist
- Light: too embarrassed to say–it’s too low, that I know! But we’re figuring out how to set up some grow lights
- Longest strand: 20 cm from soil to node of last leaves
- Number of strands:
- Signs of pests: thin webbing, a single tiny tiny tiny white crawler
- Signs of care issues: some dried leaves, some dropped leaves, some etoliation
- Repotting:
- from 3.5 inch nursery pot into custom pot for wall-mounted planter (roughly same volume, but narrower and deeper)
- used mostly same soil, but refreshed around it with a leftover mixture of perlite, coco coir, peat moss, orchid bark, charcoal, dolomitic limestone
Research notes
Atmosphere
- Light: bright, indirect; a couple hours of direct sun in early morning or late afternoon
- Humidity: normal to high; 60 to 90% is ideal
- Temperature: ideal is 21 to 26 degrees Celsius; don’t go below 12
Water
- Preference:
- evenly moist but not soggy
- bottom watering to avoid wetting leaves
- use room-temperature filtered water, rain water, or water that has been left to stand 24 hours
- Frequency: when top 2 cm are dry; less in winter
- Leaves may lose sparkle when thirsty
Substrate, fertilization, and pots
- Roots: not a large root system; prefer being slightly rootbound
- Substrate type: light, airy, well-draining, but retains some moisture; prefers some organic material
- peat + perlite + some organic stuff
- Fertilization: every 2 weeks with diluted, balanced fertilizer in growing season
- Repotting: in spring
- rarely; every 2 to 3 years
- avoid when possible; only when rootbound
- go up only one size when necessary
- can keep some old soil and refresh around it with similar mix
Lifestyle
- Maturity:
- takes about 3 years
- 7 to 10 cm (high or tall?)
- up to 90 cm tall (perhaps they mean length of vine?)
- Common problems:
- pests: spidermites, mealybugs, thrips, scale (signs: puckered, crisping, mottled, deformed leaves; stunted growth; treatment: dab rubbing alcohol)
- overwatering (signs: yellowing leaves, brown spots, dark new foliage, leaves curling and dropping downwards; treatment: check for root rot, repot into drier substrate)
- underwatering (signs: yellowing, puckered, or crisping leaves)
- too high a concentration of salts in the water (signs: white dots on underside of leaves)
- too little light (signs: etoliation, dropped leaves)
- too low humidity (signs: dry, crispy leaves; brown edges or dull leaves)
- Pruning: remove damaged or dead leaves; to shape
- Propagation:
- pups
- Remove pups (growths that have developed roots) from the stem.
- Treat as a stem cutting.
- stem cutting
- Snip off stem with at least two leaves above a node.
- Remove bottom leaves (if there are more than two leaves).
- Set stems up to root in water or substrate. In substrate may be quicker to develop roots.
- In water:
- Keeping leaves dry, place into filtered water.
- Place in bright, indirect light.
- Refresh water once or twice a week.
- When roots are about 2 cm long (about 1 to 2 weeks), plant into soil.
- In substrate:
- Add an airy substrate to a small pot or tray.
- Optionally, dip stem in rooting hormone.
- Plant stem into substrate or lay stem cuttings on top of substrate; don’t compress substrate around it.
- Ensure substrate stays lightly moist.
- Can cover with a clear bag or glass to maintain humidity; remove every day or two to vent and avoid rot.
- In water:
- pups
Research sources: Wikipedia, tribe, Smart Garden Guide
